🛡️ Authentik
This guide walks you through setting up Authentik as an OIDC provider for Booklore. By the end, your users will be able to sign in to Booklore with their Authentik account.
The setup has two parts: creating an OAuth2 application in Authentik, then entering the credentials in Booklore. The whole process takes about 5 minutes.
This guide covers the initial setup. For details on user provisioning, group mapping, OIDC-Only Mode, and other advanced features, see the OIDC Settings reference.
🚀 Part 1: Configure Authentik
Create the Application
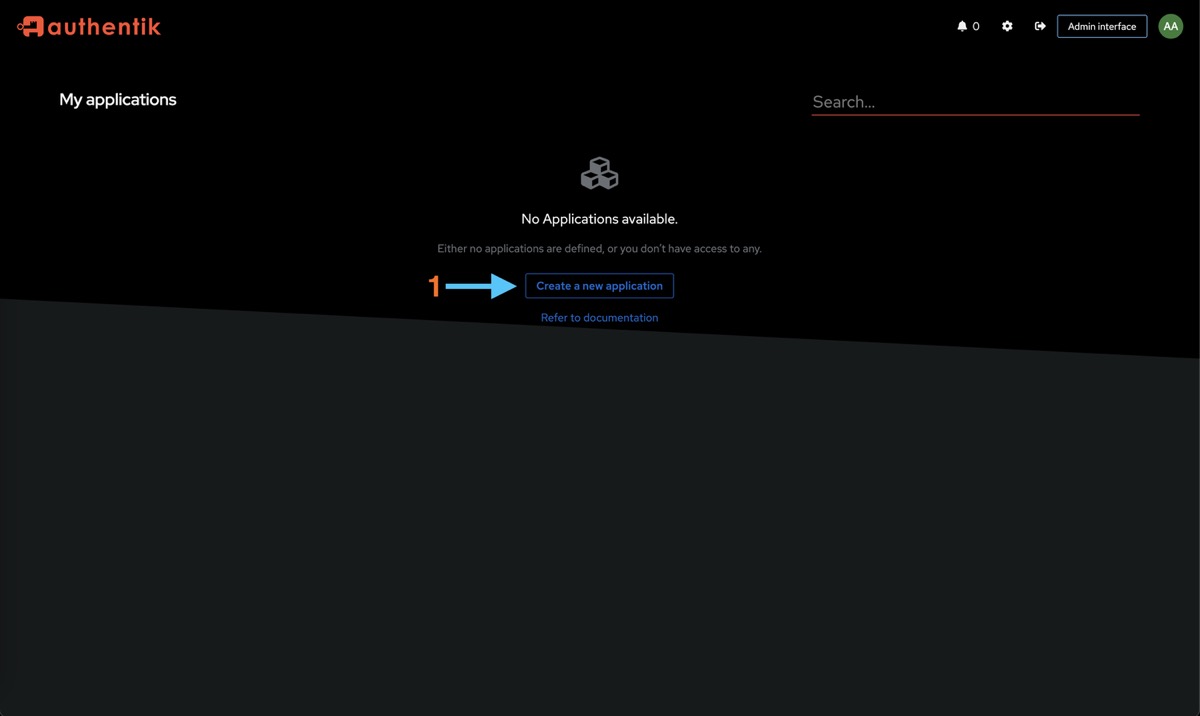
Open your Authentik admin dashboard and click "Create a new application". This launches the setup wizard.
Fill in the application details:

- Name:
Booklore(this is what users see on the Authentik dashboard) - Slug:
booklore(used in URLs, keep it lowercase)
Click Next.
Select Provider Type

Choose OAuth2/OpenID Provider and click Next.
Configure the Provider
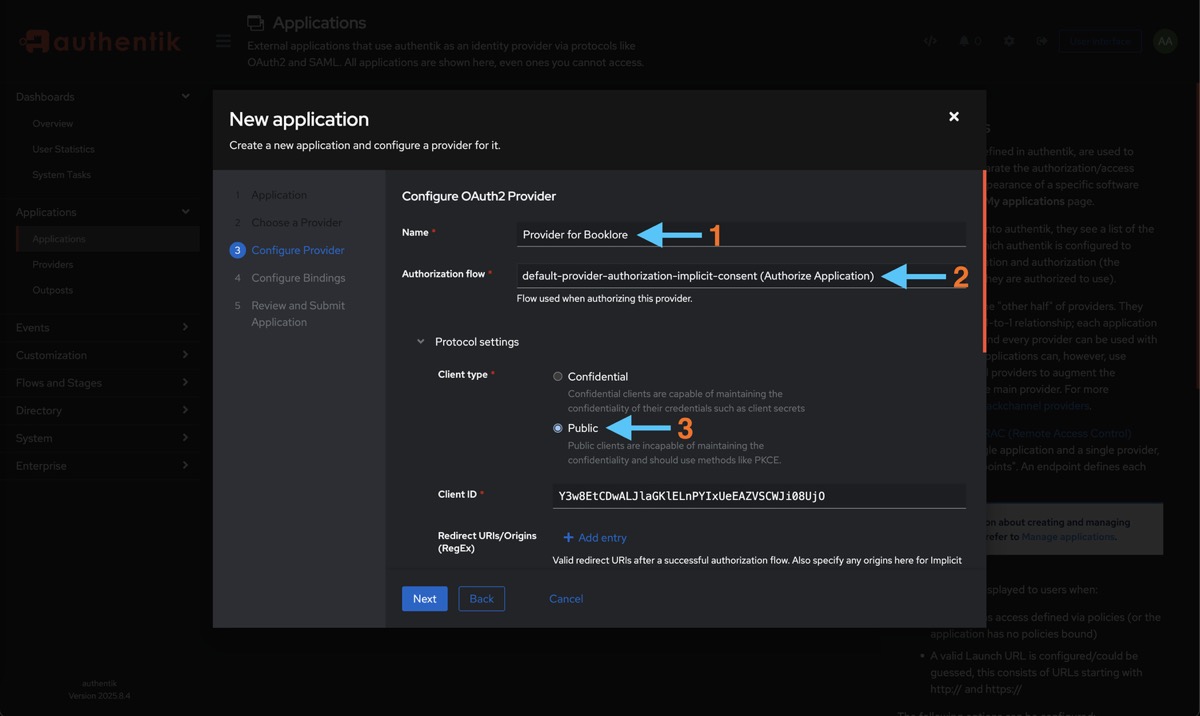
- Name:
Booklore OAuth2 - Authorization Flow:
default-provider-authorization-implicit-consent(users won't be prompted to approve access each time they log in) - Client Type:
Public(Booklore uses PKCE, so a client secret isn't needed)
Set Up Redirect URIs
This tells Authentik where to send users after they authenticate. The redirect URI must match exactly or the login will fail.
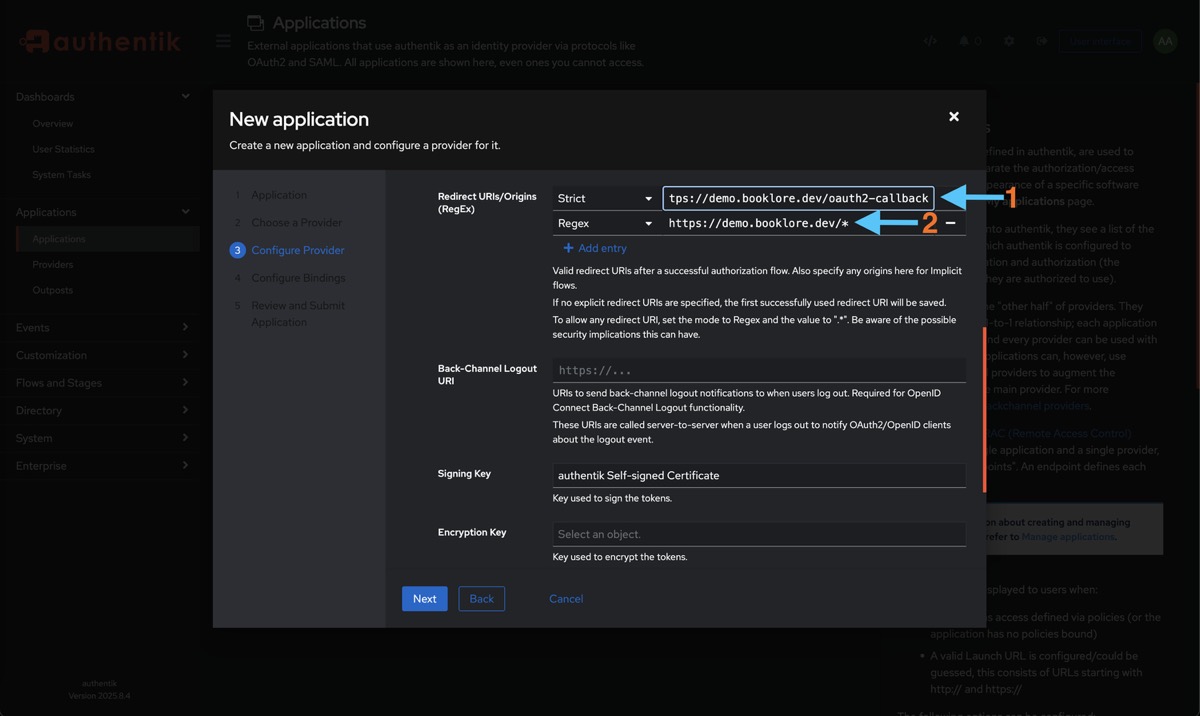
Add the following (replace books.example.com with your actual Booklore domain):
- Strict:
https://books.example.com/oauth2-callback - Regex:
https://books.example.com/*
After you configure the provider in Booklore (Part 2), the OIDC settings page shows a Provider Configuration Reference panel with the exact Redirect URI, Post-Logout Redirect URI, and Back-Channel Logout URI. You can come back to Authentik and update these to match exactly.
Set the Signing Key to authentik Self-signed Certificate.
Local development example:
Strict: http://localhost:4200/oauth2-callback
Regex: http://localhost:4200/*
Configure Scopes
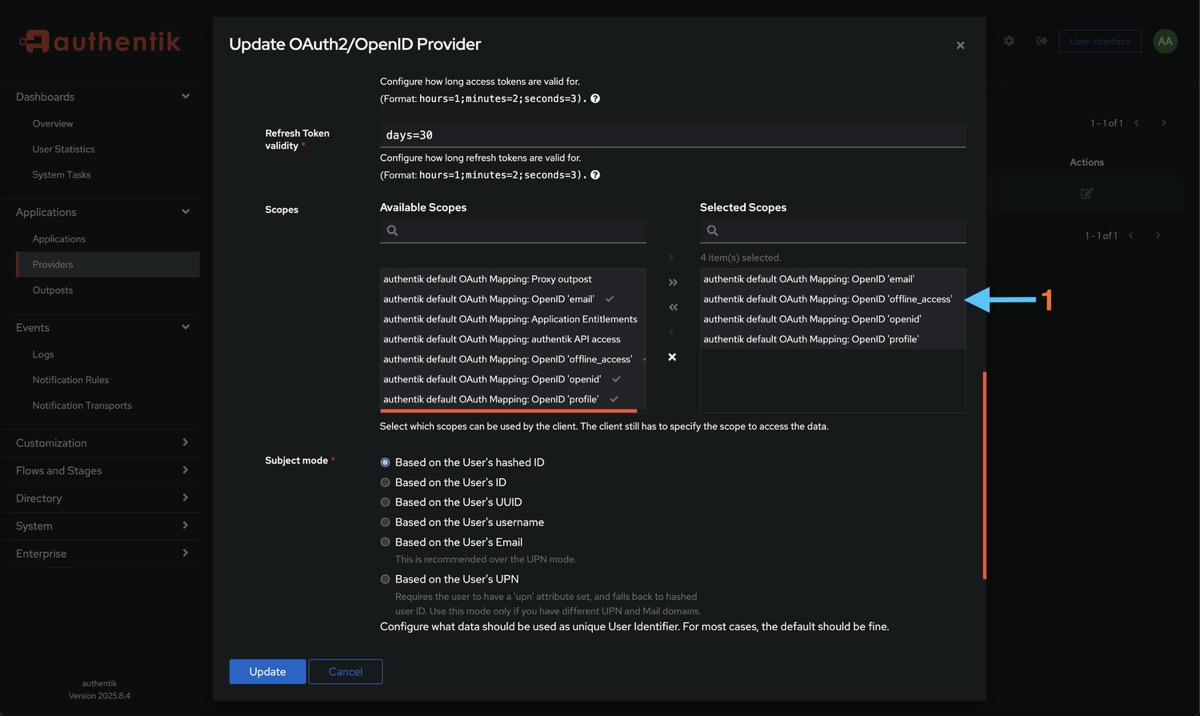
Add these scopes (all required):
| Scope | Why Booklore needs it |
|---|---|
openid | Required for OIDC. Provides the user's unique subject identifier. |
profile | Username and display name. |
email | Email address for notifications and email-to-device. |
offline_access | Allows Booklore to issue refresh tokens for extended sessions. |
Click Save.
Bind Users
Control which Authentik users can access Booklore. Users who aren't bound to the application won't see it in their dashboard and can't authenticate.

- Type: Select User to bind individual users, or Group to bind all members of a group
- Select the users or groups who should have access
- Click Save Binding
Create a group like booklore-users in Authentik and bind it to the application. Then just add or remove users from the group instead of editing bindings each time. This also pairs well with Booklore's Group Mapping feature.
🔑 Part 2: Get Your Credentials
You need two values from Authentik to configure Booklore: the Client ID and the Issuer URL.
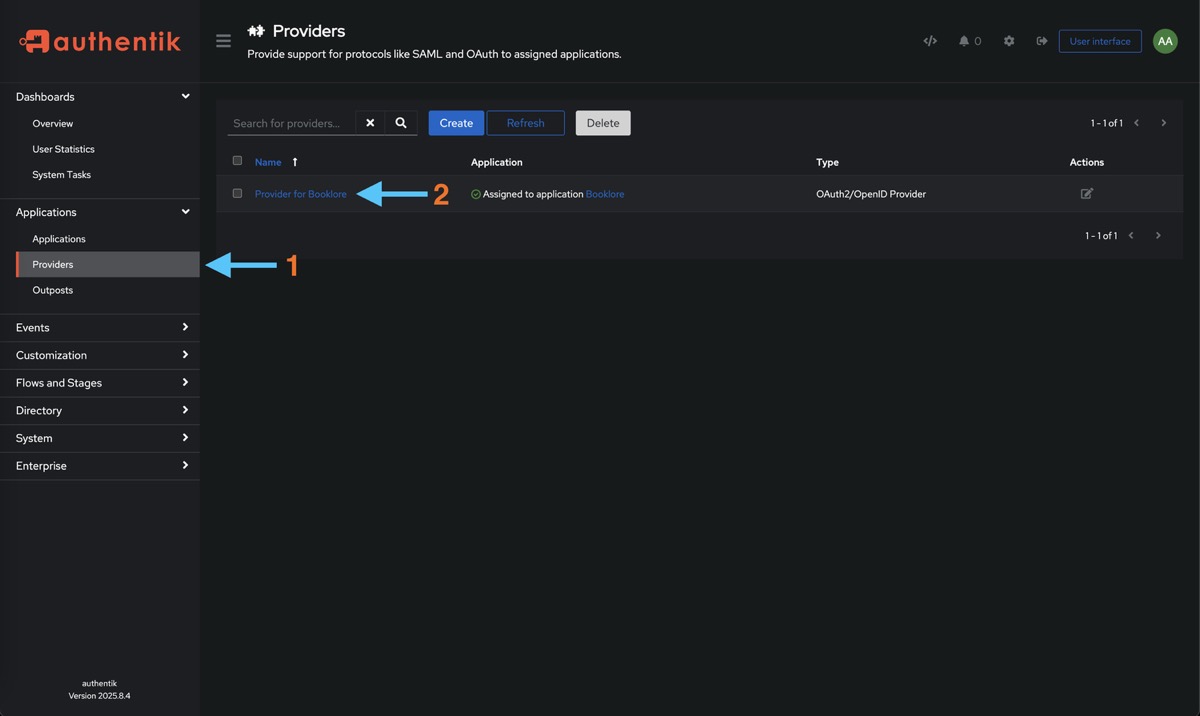
Go to Applications > Providers and click on the provider you just created.
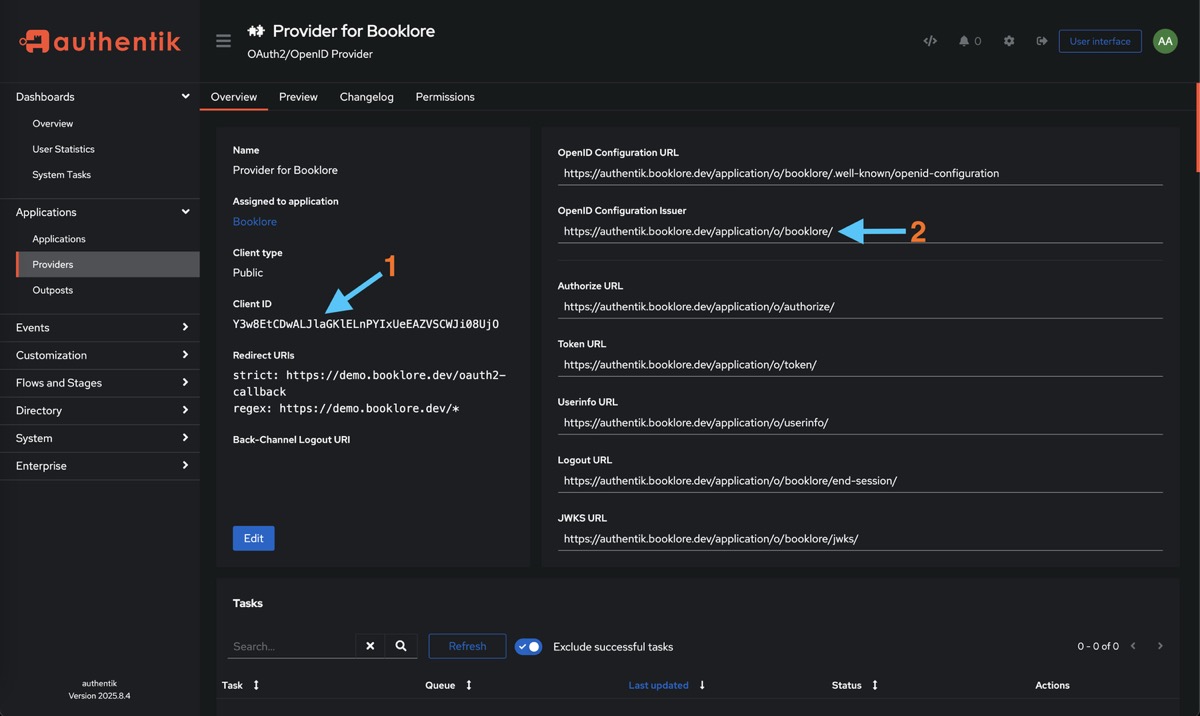
Copy these two values:
| Value | Where to find it | Example |
|---|---|---|
| Client ID | Shown on the provider detail page | a1b2c3d4e5f6... (long alphanumeric string) |
| Issuer URL | Listed as "OpenID Configuration Issuer" | https://auth.example.com/application/o/booklore/ |
Keep these handy for the next step.
⚙️ Part 3: Configure Booklore
Navigate to Settings > OIDC in Booklore.

Fill in the provider configuration:
| Field | Value |
|---|---|
| Provider Name | Authentik (shown on the login button) |
| Client ID | Paste the Client ID from Authentik |
| Client Secret | Leave empty (public client) |
| Issuer URI | Paste the Issuer URL from Authentik (include the trailing slash) |
The default claim mappings work with Authentik out of the box:
| Claim | Value |
|---|---|
| Username | preferred_username |
email | |
| Display Name | name |
| Groups | groups |
Click Test Connection to verify Booklore can reach Authentik's discovery endpoint. All checks should pass.
Click Save, then toggle OIDC Login to ON in the Login Methods section.
Optional: Configure Back-Channel Logout
For sessions to stay in sync (so logging out of Authentik also logs the user out of Booklore), configure back-channel logout in Authentik:
- In Booklore's OIDC settings, find the Provider Configuration Reference panel
- Copy the Back-Channel Logout URI
- In Authentik, go to your provider settings and paste it into the Backchannel Logout URL field
🧪 Test It
The fastest way to test without logging out of your admin account:
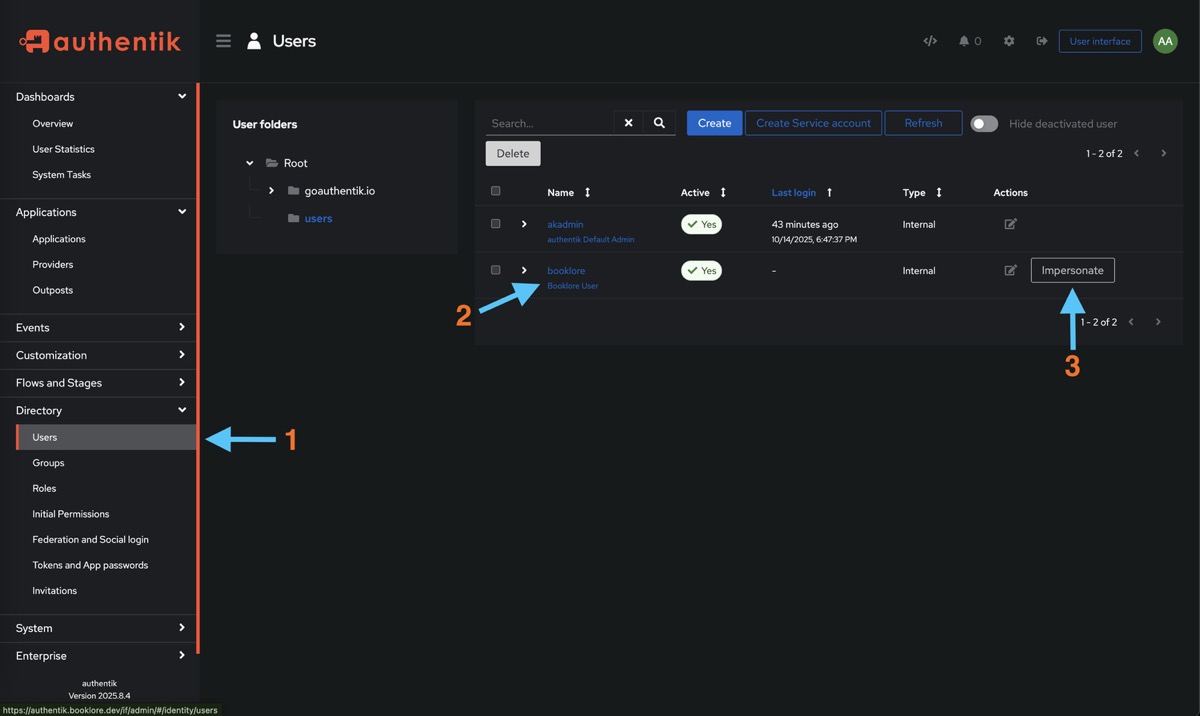
- Go to Authentik > Directory > Users, select a user bound to Booklore, and click Impersonate
- Navigate to your Booklore instance. You should see the Authentik login/dashboard.
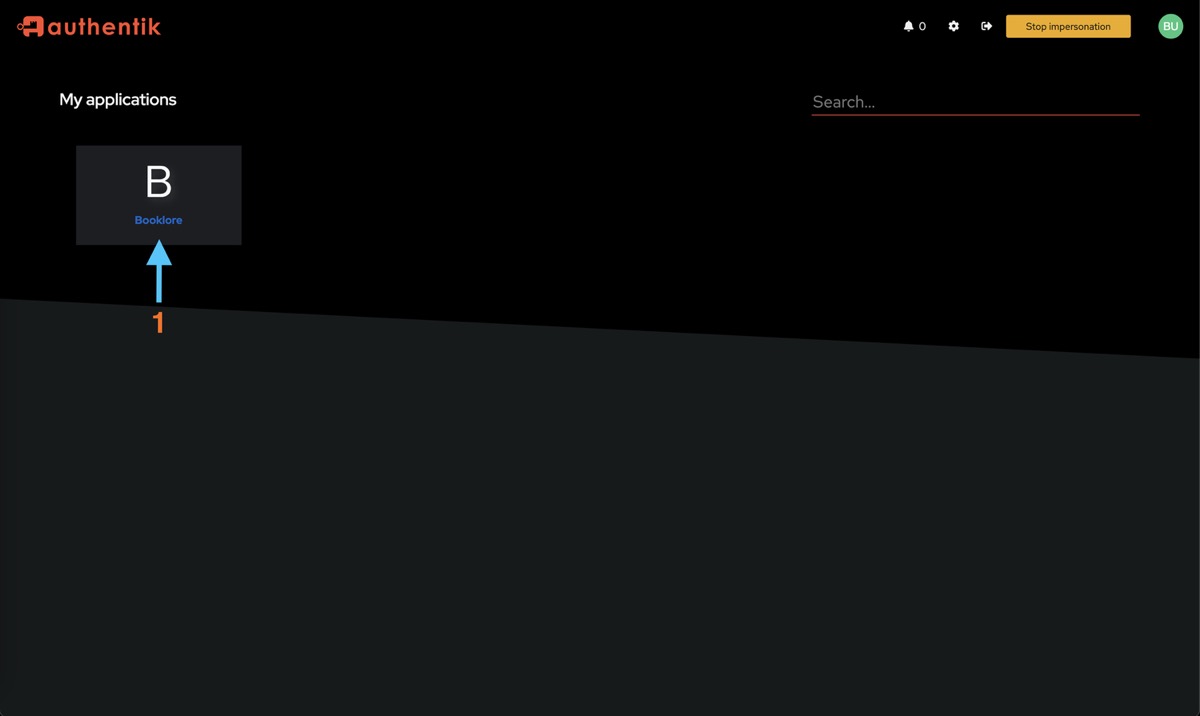
- Click the Booklore tile. You should be redirected and logged in automatically.
- Verify the username and email are correct, and that you can access your libraries.
Alternative: Open an incognito window, go to Booklore, and click "Sign in with Authentik".
🔧 What's Next
Now that basic OIDC is working, you can configure additional features in Booklore's OIDC Settings:
- User Provisioning: Automatically create Booklore accounts when users sign in for the first time
- Group Mapping: Map Authentik groups to Booklore permissions and library access (Authentik includes groups in the
groupsclaim by default, no extra configuration needed) - OIDC-Only Mode: Hide the local login form and redirect everyone to Authentik
- Account Linking: Migrate existing local users to OIDC without losing their data
🛠️ Troubleshooting
Login Redirects But Fails
- The Redirect URI in Authentik must match exactly. Copy it from Booklore's Provider Configuration Reference panel.
- Check that all four scopes (
openid,profile,email,offline_access) are assigned to the provider. - Verify the Client ID has no extra spaces.
"User Not Provisioned" Error
Auto-provisioning is off by default. Either enable it in OIDC Settings, or create a Booklore user with a username that exactly matches the Authentik preferred_username (case-sensitive).
"Invalid Client" Error
- Make sure the provider is set to Public client type.
- Check that the Issuer URI ends with a trailing slash (Authentik requires it).
User Logged In But Wrong Permissions
If you're using group mapping, check that:
- The group names in Authentik match the Group Claim values in your Booklore mappings (case-sensitive)
- Group Sync Mode is set to something other than Disabled
Back-Channel Logout Not Working
- The Back-Channel Logout URI must be reachable from Authentik's server. If both run on the same Docker network, use the internal hostname (e.g.,
http://booklore:8080/api/v1/auth/oidc/backchannel-logout). - Not all Authentik versions support back-channel logout. Check your Authentik version.
Can't Access Booklore At All
- Admin backdoor:
/login?local=true - Nuclear option: set
FORCE_DISABLE_OIDC=trueas an environment variable and restart